
Monday 31 December 2012
The Mercury confirms Mt Wellington guidance is lacking
Saturday 29 December 2012
Mount Wellington by Car
 |
| View of the Tasman Bridge from near the Mount Wellington summit. |
Despite its obvious natural appeal and popularity, there
are various suggestions about how it should be developed, with the most
prominent of these being the idea for a cable car. The view has been expressed
that we’re not “making the most” of it, and that visitors need “something to do”
when they get there.
To me the mountain seems to be quite popular without a need to enhance it artificially. I believe most tourists come here to see Tasmania rather than the same attractions they could see bigger and brighter elsewhere, and I’ve never been lost for something to do when presented with a view like that from the top of Mount Wellington. I think the mountain is probably a better tourist attraction without large-scale tourist infrastructure being built on it, but I do agree it needs a few low-key improvements to help tourists make the most of a visit.
To me the mountain seems to be quite popular without a need to enhance it artificially. I believe most tourists come here to see Tasmania rather than the same attractions they could see bigger and brighter elsewhere, and I’ve never been lost for something to do when presented with a view like that from the top of Mount Wellington. I think the mountain is probably a better tourist attraction without large-scale tourist infrastructure being built on it, but I do agree it needs a few low-key improvements to help tourists make the most of a visit.
If people really do return from their mountain visit
feeling that there wasn’t enough to do, then perhaps it is because they may not
be entirely clear where things are, where they can stop for a view or a picnic,
where they can take a walk that is within their capability. Some might not be
warned to take a jumper, coat, hat and gloves when it looks nice and sunny down
below. To some extent I think this is because there is a lack of signposting and
information. Hence, I decided to at least try to address this problem with
Mark’s guide to finding enough to “do” on the mountain to make a visit
worthwhile.
Really, there’s a whole mountain’s worth of stuff
available. You could easily spend several days on the mountain, as long as you
were happy to walk a lot. Anyone can find enough to enjoy a few hours in this
magnificent natural environment, unrivalled in proximity to any other Australian
city.
Mount Wellington Introduction
There are plenty of books about Mount Wellington, so I
won’t try to repeat everything they say, this is more of a “how to enjoy Mount
Wellington on its own terms” item. There are no shops on Mount Wellington, you
can’t buy anything up there, there are no “things” for the kids to do. Which is
good because you can’t spend any money up there.
 |
| South Arm and Tasman Peninsula from Sphinx Rock |
Fortunately there’s a road to the top, but it is narrow
and winding in places. It has steep drop-offs but good cable barriers. You will
want to drive carefully, and walkers and cyclists will thank you for it. Most
people drive up and down without incident. Overall, the drive is really a great
part of the experience. You may want to share the driving, as looking at the
view while driving is not recommended. Be prepared to stop to enjoy the
views.
There are various places to stop along the road, some
good, some not. I will try to note for you all the places where it may be worth
stopping, but some of the parking areas are tiny and/or dubious. Use your own
judgement, and make sure you actually park entirely off the road. Other vehicles
will need the whole width, as you will see. If you stop in the roadway, you may
cause a problem, even a hazard if you are stopped around a blind corner. If the
road is snowy or icy, it will have an extra level of difficulty. Many people
stay off it at such times, and you may find it is closed at some point. There
are signs to warn of this as you approach the mountain.
Using this guide
You might be someone with a couple of hours to spare,
who just wants to get out of the car a few times to look at the view, and walk
on fairly level ground in your normal shoes. Then again, you might have all day,
want to get out and see all the wild and rough tracks on the mountain, and be
happy to clamber up and down anything in all kinds of weather. You might also be
somewhere in between, and I’ll try to cater to all tastes. When there’s a walk
to do, I’ll try to let you know what you’re in for.
Longer walks will be added later, taking from 90 minutes
to half a day or longer. These will require a decent level of fitness and proper
clothing. Some experience in the bush is recommended.
I’ve put this info into a Google map as well, and you
can use either or both. I use Google Maps on Android to access the map while out
and about. If you want, just print out the pages from this document with the
drive description, or print the whole thing. Google Map at http://goo.gl/maps/Kg5rM
I also suggest that if you want to spend the whole day
or longer on the mountain, and especially if planning to do the longer walks, go
and buy the Mount Wellington Recreation Map. Sold wherever maps are sold, but
especially at Hobart Service Tasmania and the Hobart Map Shop. You might also
find that the Wildside Café at Ferntree has them.
Distances shown against items are from the intersection
of Huon Rd with Pillinger Drive, zero the tripmeter as you turn if you like, it
may not be necessary.
Drive description
From the city, get onto Davey St, get in the right hand
lane and continue straight ahead. The last set of traffic lights is where you
really need to go straight ahead. Make sure you don’t head left in the dual
lanes onto the Southern Outlet heading for Kingston. (If you do, don’t panic,
drive up the hill and turn off left to Mount Nelson then return down the hill
and turn left again, back onto Davey St.)
Having avoided driving towards Kingston, you now just
follow Davey St as it becomes the Huon Road and heads to Ferntree. There is a
sign some way up here which will warn you if any of the gates on the mountain
road are closed. If they are, usually for snow and ice, decide for yourself if
you want to proceed anyway. You can always park somewhere below the closed gate
and walk.
To head straight up the mountain, turn right up
Pillinger Drive in a sharp switchback corner which is well signposted. If your
vehicle can't make this tight turn, proceed along the Huon Road a short
distance, to the Ferntree Tavern carpark which specifically enables buses to
turn. (Optional) Instead of turning up there immediately, you can proceed a
little further along the Huon Road to the [1] CBD
of Ferntree before heading up the mountain where you will find:
[1a] The Fern Glade Carpark – This is the best place to park if walking from Ferntree. There are various walks from this point, including the main walk to the summit.
[1b] Wildside Café – Stock up here with lunch or snacks, or visit for a coffee and a feed afterwards. Open seven days, 8am to 7pm. They have indoor and outdoor seating, and a range of food and drink. It’s warm indoors. As at late October 2012, they had put some huge maps of Mt Wellington park on the walls, which would be very useful for intending walkers. See them here http://ferntree.tas.au/directory/fern-tree-general-store-and-cafe
[1c] Ferntree Tavern – A good spot for a feed and/or beverages afterwards. Larger vehicles use the carpark as a turning circle. Open 10am to late, 7 days a week. See them here http://www.ferntreetavern.com.au/ or phone on (03) 6239 1171.
[1d] Ferntree Park – Over the main road from the tavern, this is a good lunch spot. There's a playground for the kids, rudimentary toilets, a shelter with a fireplace, tables and chairs, and 3 wood-fired BBQs. Several walks also commence here, including the short walk to Silver Falls.
Silver Falls Short Walk – 30 mins return
ALONG 4WD TRACK THROUGH FOREST TO SMALL WATERFALL, EVEN SURFACE WITH MODERATE CLIMBING.
Park at the
Fern Glade parking area and walk around the road carefully to the entrance to
Ferntree Park. Alternatively, park in the short road running between the tavern
and the café if there is room. There is some space across the road from the bus
stop.
Enter the park
and turn left. The track is wide and easy, and after about ten minutes reaches
an intersection. Turn right and climb to Silver Falls. The water cascades down a
mudstone and sandstone cliff. The falls may have been higher in past years, as
the base may have been filled in after flooding. Retrace your steps to
Ferntree.
Along the track
there are various artefacts of Hobart’s water supply infrastructure, and it is
worth pausing to read the signs.
[2] At some point you will head up Pillinger Drive . Just above the intersection is a sign advising of road closures. Care is required driving amongst the houses which stretch a short way up the road.
[3] The Bracken Lane Carpark (0.8 km) – Driving beyond the end of the houses, this small parking area is on the right. Park here to walk to O’Gradys Falls. Don’t block the fire trail.
O’Gradys Falls Short Walk – 35 mins return
MAINLY ALONG 4WD TRACKS THROUGH FOREST TO WATERFALL, VIEWS OF MOUNTAIN, SOME CLIMBING, SOME UNEVEN SURFACES.
Park at the
Bracken lane carpark.
Head off down
the Bracken Lane Fire Trail. Bear left on the higher track at the fork reached
after about 5 minutes, where there is also a sign, and head onto the O’Gradys
Falls Track. This affords good views to the imposing Organ Pipes high above, and
ends at an intersection, beyond which the sign indicates continuation to the
falls slightly to the left on the Betts Vale Track. This narrower walking track
takes you shortly to O’Gradys Falls. Retrace your steps to the car. It is
unclear whether the falls are actually natural, or may have been modified to
improve the ‘cascade’.
[4] Radfords Track Carpark (1.25 km) – Continuing up the road, there’s a small parking area on the left where Radfords Track crosses the road.
[5] Woods Track Carpark (2
km) – A little further, there is a small carpark on the left hand side
just past Woods Track. You can walk carefully back down the road, and then
steeply uphill to find Rocky Whelans Cave.
 |
| Rocky Whelans Cave |
Rocky Whelans Cave Short Walk – 15 mins return
SHORT STEEP CLIMB ON UNEVEN SURFACES THROUGH FOREST TO SMALL CAVE/OVERHANG IN SANDSTONE CLIFF.
Park at the
Woods Track carpark.
Walk up the
steep Woods Track for about 150m. There is a narrow track marked for Rocky
Whelans Cave to the right heading up a bank. The cave is just a minute or so
along here, in a sandstone formation. It is not really clear whether Rocky
Whelan, a bushranger who was hanged for murder, ever used this cave. It would
provide some shelter in the rain, but it wouldn’t be too comfortable. Some
historians believe he probably used another cave closer to present-day
Kingston.
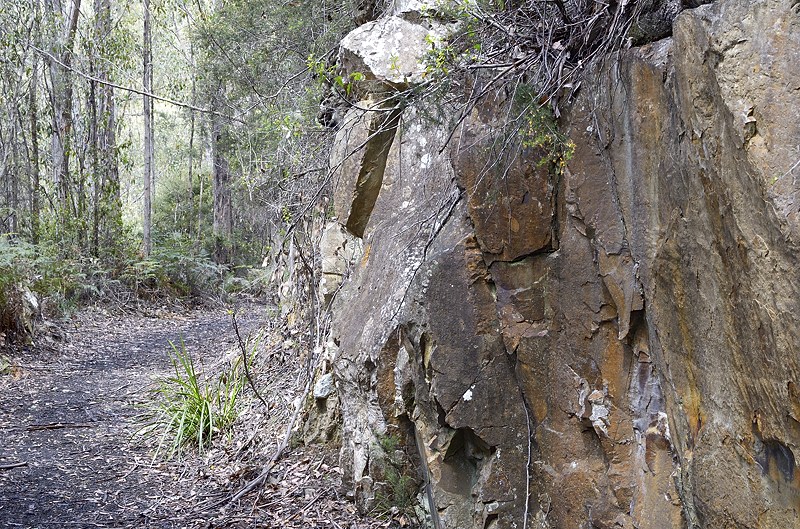
[6] Carpark for the Octopus Tree (2.6 km) – Further along, a medium-sized carpark is just below the hairpin. The walking track to the Octopus Tree leaves behind the barrier on the tight bend. This is the Shoobridge Track which also leads to various other locations on the eastern face of the mountain.
 |
| The Octopus Tree |
Octopus Tree Short Walk – 15 mins return
WALK THROUGH FOREST ON NARROW TRACK TO WHERE A HUGE EUCALYPT GROWS ON A BOULDER, SOME CLIMBING AND SOME UNEVEN SURFACES.
Park at the
Octopus Tree Carpark just below Shoobridge Bend.
Shoobridge
Track leaves on the outside of the hairpin bend – take care with the traffic
here. Walk along Shoobridge Track through the damp forest, taking the left fork
where the Circle Track departs to the right. The forest here has great fungi in
autumn. The Octopus Tree is signposted just to the right of the track. It is a
huge eucalypt which has grown on top of a large boulder, and its roots drape
around the boulder looking like a monster octopus. Shoobridge Track continues
and Sphinx Rock, the Lenah Valley Track and Junction cabin can be
accessed.
[7] Roadside Springs Lookout (4 km) – Driving about another 1.4km, you will find a low wall on the left on a tight bend, with space for a few cars to park. The view is available here for no effort whatsoever. If you’re OK to walk for a couple of minutes, I suggest driving a little further.
[8] Springs Lookout Carpark
(4.2 km) – Another 200m up the road, the carpark on the right allows
easy access to the main lookout, as well as being closest to the North-South
Cycle Track. Sometimes there’s space here when the main carpark is busy. I
recommend a walk to the lookout, which is signposted. You can walk from here to
the main Springs site a couple of minutes through the trees. Also, this is the
start of the North-South Track, a cycle track that descends to the Glenorchy
Mountain Bike Park.
[9] The Springs (4.3
km) – Driving another 100m you will find the main Springs carpark. I
still recommend walking back to the lookout. It can be busy here, and if there’s
no space, you can also park at the Upper Carpark as long as you’re OK to walk
back down the hill a short way. At this main Springs site there is a shelter hut
with fireplace, toilets, information signs, places to sit and eat lunch, a water
tap* and the start of several walking tracks. I recommend a walk to Sphinx Rock
for walkers. (*The water taps here and at The Chalet are untreated and fresh out
of the mountain streams. The Council have put big warning signs on them to cover
themselves in case you have a delicate constitution. I drink the water and I
think most local walkers do too, but then we might be immune to any bugs after
all these years.) The walk to Sphinx Rock commences from here along the Lenah
Valley Track.
 |
| The summit seen from Sphinx Rock |
Sphinx Rock Short Walk – 40-45 mins return
WALK ALONG WELL MADE TRACKS THROUGH ATTRACTIVE FOREST TO A VIEWPOINT ABOVE A SANDSTONE CLIFF, MINIMAL CLIMBING, EVEN SURFACES.
Park at The
Springs main carpark, or walk here from one of the others. The track leaves
behind the toilet block.
This is the
Lenah Valley Track, and will lead you all the way to Lenah Valley eventually.
Walk first gently uphill and then level and gently downhill through lovely
forest for 15-20 minutes. You will find a turnoff to the right. There is a steep
cliff here, so keep kids close. Access is through a kid-proof gate to minimise
the chance of accidents. Sphinx Rock is a small cliff (large enough to kill you)
in the sandstone underlying the dolerite which forms the upper part of the
mountain. There are good views from here, and there can often be views here when
there are few elsewhere on the mountain.
[10] Upper Springs Carpark and Springs Hotel site (4.6 km) – Drive up the one-way access road opposite the main carpark and have a look at the site of the old Springs Hotel. It’s worth getting out and doing some exploration around the grassy area. Great place for a hotel hey? Maybe, but the substantial hotel that was here was never very successful financially, and then burnt down. The view of the mountain is good from here, and it’s a quieter place to have lunch than the lower carpark. Some longer walks depart from this carpark up the set of steps to the right of the open hotel site. This is the main route up the mountain from The Springs.
[11] Climbers Carpark (6.9
km) – The road now heads along the front of the mountain. Some distance
up the road, you will detect that this small parking area is near when you see a
"turning traffic" sign. This carpark is useless for most of us. It is small and
pokey and has room for 5 cars if they’re parked strictly in accordance with the
diagram on the sign. However, it allows climbers quicker access to the Organ
Pipes up a very steep track. The rest of us have better ways to get to the Organ
Pipes, and may only want to use this carpark if it’s empty and we want to get a
photo from here. If so, look out for traffic, and there are better photo spots
anyway.
 |
| The Chalet |
 |
| The Organ Pipes |
Organ Pipes Short Walk – 45-60 mins return
WALK ON THE FACE OF THE MOUNTAIN TO ARRIVE BENEATH THE ORGAN PIPE CLIFFS, MODERATE CLIMBING, UNEVEN SURFACES INCLUDING BOULDERS.
Park at The
Chalet. The track leaves up the left hand side of the shelter.
Climb steeply
up the hill behind The Chalet, and cross the small creek where the track turns
left. Walk along here for 20 minutes or so, until you find yourself closely
beneath the Organ Pipes to your right. You can walk along further if you like,
or turn back when you’ve seen enough or used enough time. There are good views
from here. The track is bouldery in places, and can be damp underfoot at
times.
[13] Panorama Track Carpark (8.9 km) – Continuing above the Chalet, the road heads for a distance away from the summit and out onto Mount Arthur. Here you will find a small carpark on the right. Stop here to walk up the Panorama Track.
Panorama Track Short Walk – 50-60 mins return (but longer with variants described)
CLIMB THROUGH ALPINE FOREST WITH GREAT VIEWS, MODERATE AND STEEP CLIMBS MAINLY ON UNEVEN SURFACES.
Park in the
small carpark near the lower end of the Panorama Track. The track leaves about
50m up the road on the left.
Follow the
track as it winds upwards through button grass, boulders and snow gum forest to
rejoin the road about 1 km below the Pinnacle. This track is rough underfoot in
many places, and can be quite wet, muddy and slippery. The walk as noted then
just retraces your outward steps. However, you can continue walking once you
rejoin the road and walk to the Pinnacle if you wish, or walk back down the
road. If you walk down to Luckmans Hut (see below), it is possible to continue
down past Luckmans Hut and rejoin the Panorama Track, but the track is quite
indistinct. Please note that in poor visibility navigational skills may be
useful.
 |
| Hobart from the Blockstream carpark. |
[15] Lost World Carpark
(9.4 km) – Only a few hundred metres further the road turns sharply
back towards the summit, below Mount Arthur. There’s room for two or three cars
in a poor carpark inside the corner, depending on how well people park. However
getting out of the carpark afterwards can be tricky. You can also park at the
Blockstream Carpark below here, or the larger carpark above here and walk along
the road a little way. The Lost World Track starts on the outside of the tight
corner (see longer walks, coming soon). The track to Collins Bonnet starts on
the East-West Fire Trail a few metres above the corner (also see longer
walks).
 |
| The summit from above Big Bend |
[17] Luckmans Hut (or
Skating Rink) Carpark (10.5 km) – Another 500m up the hill from the
large carpark, several small and rough spaces for cars can be found on the left
hand side. Short walks to Luckmans Hut and the old skating rink can be made from
here.
Luckmans Hut (10 mins) and Skating Rink (5 mins) Short Walks
TWO VERY SHORT WALKS HIGH ON THE MOUNTAIN, OFF-TRACK AND ON MINOR PAD, SOME CLIMBING AND UNEVEN SURFACES.
Park in one of
the scrappy spaces on the left of the road.
Luckmans Hut is
below the road. Find a faint pad heading down the open alpine herb field.
Luckmans Hut is about five minutes down here. You can continue past the Hut and
rejoin the Panorama Track.The Skating Rink is on the other side of the road,
only about 75m from the corner. Head roughly southwards across the heath. It’s a
bit rough and wet in places. The skating rink is a quite obvious concrete
structure, built in the late 1930s. It is truly tiny, so was probably not used
for very spectacular skating.
[18] Upper Panorama Track Carpark (11.5 km) – Another kilometre up the hill, this tiny carpark is on the right, near the top of the Panorama Track which arrives at the road from the left. There are several very small parking spaces along the uphill-side of the road between here and the summit.
[19] Mount Wellington
Summit (12 km) – Finally you will arrive at the summit. There is a
one-way system which means you drive clockwise around the pinnacle to find the
carpark. A number of features here are worth visiting, apart from just sitting
anywhere you like and marvelling at the view. Some people have trouble with car
remote locking here. If so, there are instructions inside the visitor shelter
for solving the problem.
[19a] The Pinnacle itself – You should climb up here if you can, especially if you have walked to the top! On top is a “trig” point. The “point” is actually the metal point in the ground, and the pyramid structure above it enables people at distant locations to see it (with good optics). They were used for trigonometric surveying, and are largely useless in the GPS age. This one is most useful for holding onto as you climb to the top.
[19b] Visitor Shelter – Overlooks Hobart east of the carpark, and has interpretive panels inside along with a panoramic guide to what you can see. This latter is complete with errors however.
The Mount Wellington pinnacle

[19c] Summit Boardwalk – This runs down beside the visitor shelter. Great views can be had from here on clear days, and it is worth a walk for those who can.
The visitor shelter at the summit

[19d] Walk around the roadway – It is worth walking all around and seeing the views in all directions. Keen walkers will be able to spy walking destinations all over the place.
Hobart from the boardwalk

[19e] Westerly viewpoint – To the west of the carpark, this view looks out across the plateau. There is information here about the aboriginal history of the mountain. I think there is room to put in some information about what can be seen from here. I'm going to do an online panorama to name the mountains you can see.
[19f] Walkers’ Hut – You can see this on the right of the road below the pinnacle as you arrive. Rough shelter, but away from the crowds.
[19g] Walking Tracks – To the south of the carpark, beside the compound around the large concrete transmission tower a walking track heads away. This is the top of the Zig Zag Track, and it also leads to the track across the summit plateau to South Wellington.
[19h] Toilets – These are new in 2012 and quite nice.
 |
| View from part way down the ZigZag Track |
Zig Zag Track Short Walk – 10-60 minutes
A WELL-MADE TRACK TO START WITH, HAS GREAT VIEWS. SOON HEADS STEEPLY DOWNHILL BECOMING ROUGHER. WALK AS FAR AS YOU LIKE.
Having parked
at the summit, the Zig Zag Track heads southwards next to the enclosure around
the tall transmission tower.If you are going to do the Plateau Walk (next walk)
you'll probably leave this one, unless you particularly want to walk
everywhere.
The Zig Zag
Track takes you a little (or a long) way downhill on the front (east) face of
the mountain. Head along this track which gradually steepens and becomes
rougher. You can walk as far down here as you like, bearing in mind that unless
someone has gone down with the car, you're going to have to walk back up. (In
fact, you can walk all the way down to The Springs or Frentree from here if you
have someone to take the car down.) The vegetation is interesting, and the views
are quite spectacular, with the vista framed or bordered by the steep
mountainsides.
 |
| Dolerite tors on the summit plateau |
Summit Plateau Short Walk – 30-100 minutes
A ROUGHER WALK ON THE EXPOSED PLATEAU, TRACK MARKED BY SNOW POLES. SUPERB VIEWS AND LOVELY ALPINE ENVIRONMENT.WARNING: THIS WALK IS VERY EXPOSED TO POOR WEATHER, AND NAVIGATION CAN BECOME DIFFICULT IF CLOUD DESCENDS.
This walk also
departs alongside the transmission tower enclosure to the south.
This track is rough and in places poorly marked. In poor weather you can easily become lost. I strongly suggest you only undertake this walk on clear gentle days unless you know what you are doing. People DO become lost on this mountain. If the cloud comes down, you are going to find it very disorienting. This part of the mountain is extremely exposed in poor weather. If you walk far enough across the top of the mountain you actually come to the site of the Smith Monument. Dr Smith got lost when walking with friends and was never found again. Please also take warm and waterproof clothing and your mobile phone. Bear in mind that there are spots here where mobile phones don't actually work. A GPS with charged batteries will assist in retracing your steps if required.
This track is rough and in places poorly marked. In poor weather you can easily become lost. I strongly suggest you only undertake this walk on clear gentle days unless you know what you are doing. People DO become lost on this mountain. If the cloud comes down, you are going to find it very disorienting. This part of the mountain is extremely exposed in poor weather. If you walk far enough across the top of the mountain you actually come to the site of the Smith Monument. Dr Smith got lost when walking with friends and was never found again. Please also take warm and waterproof clothing and your mobile phone. Bear in mind that there are spots here where mobile phones don't actually work. A GPS with charged batteries will assist in retracing your steps if required.
The track to
South Wellington is marked about 200m along the Zig Zag Track, and heads
obliquely off to the right. There are poles all the way along this track,
although in places they are hard to find. Follow the track for as long as you
like. Eventually it descends quite a lot to South Wellington, but this is
described in the longer walks. The views are good from various points, and you
can turn left and head out to the steep edges to sit and look at the views
anytime you like. After about 45 minutes you will come to a sign pointing left
to the Rocking Stone. This spot provides good views, although the large perched
boulder no longer rocks, its plinth having moved in recent years. Take care to
retrace your steps accurately. There are views to south from along this track
that can't be obtained from the summit, and the plateau vegetation and boulders
are interesting and stark.
If you have limited time, can I suggest the following three walks as being the best to undertake.
-
Summit Plateau or Zig Zag Track
-
Organ Pipes
-
Sphinx Rock
Copyright © Mark G Hanna 2012. This work is licensed
under the Creative Commons Attribution-NonCommercial-NoDerivs 3.0 Australia (CC
BY-NC-ND 3.0) License. To view a copy of the license, visit http://creativecommons.org/licenses/by-nc-nd/3.0/au/
Basically, you should feel free to print the PDF
version for the use of yourself, your family, your friends and your guests
including guests in paid accommodation. You may not sell it to anyone, or
require any payment for it, and you may not alter it before distributing it.
Your use of the document should include attribution to me. The information is
available on the internet, and you can link to it. There should be no need to
reproduce it electronically.
Saturday 22 December 2012
Cape Pillar - Walk Description

The walk starts at Fortescue Bay. As you drive towards Port Arthur south of Taranna, the road to Fortescue Bay is signposted to the left. Initially this is Crompton Road, and it joins Fortescue Bay Rd after a couple of kilometres. The road is unsealed for the 12km trip through the forest, quite a bit of which has been logged.
The track leaves the road a couple of hundred metres before the ranger station, but it is probably best to park in the signposted parking area near the beach. If you park in the very small space across the road from the track you will need to get right off the roadway, and I think you might as well put up a sign saying "Thieves: This car unattended for a day or two."
I recommend a three day walk, but you can do it in two. I have done it both ways, and two days is a bit rushed. The two-day itinerary would look like this:
- Day One - Walk to campsite, somewhere between Bare Knoll and Perdition Ponds in the morning. Drop packs and proceed to the cape with day packs, returning to your campsite in the evening. The walk out to the cape takes longer than the distance on maps might indicate.
- Day Two - Return to the road, which will probably take slightly less time than the walk in.
Obviously a three-day, two-night trip enables a more leisurely day in between for the visit to the cape, and there is enough to see to fill a day.
Choice of campsite isn't necessarily easy. The best water is at Lunchtime Creek, but this is some distance from the cape and cliff views. Water is also often available at the southern end of Corruption Gully, closer to the cape. Perdition Ponds is the most convenient campsite for visiting the cape, and is where I have chosen to camp. The water from the ponds has a slight brackish tang to it, and some people believe it needs to be boiled. I'd probably recommend boiling and taking some Staminade to flavour it as drinking water, but it's fine for cooking and tea/coffee. You could of course carry water in from Lunchtime Creek.
Therefore my proposed walk would be as follows:
Day One
 |
| Waratah along the Cape Pillar track |
A descent to Lunchtime Creek follows and on the way the track passes the Bare Knoll campsites. There are many tentsites amongst the trees, and this site seems to be favoured by school groups. They collect water on their travels from Mount Fortescue or from Lunchtime Creek, and if you are going to try camping here you will have to work out where/when you will get your water. The final descent to Lunchtime Creek is steep. The water is usually flowing well here, but might be unreliable in very dry weather. There is a boot-scrubbing station here, and a few small campsites. You might plan to camp here and find no room, so be prepared for that.
 |
| Perdition Ponds |
The awesome views commence about ten minutes beyond this point, enabling sunrise and sunset visits to the clifftops on all days of your visit, and for me this easy capacity to get to the clifftop makes Perdition Ponds the preferred campsite. Eating breakfast or dinner perched 270m above Storm Bay as the sun rises or sets is a great way to start or finish a day. Day One would finish therefore with a visit to the cliffs, continuing along the track up a small hill onto the mainly flat clifftops in this vicinity, until you find a view you are happy with that allows comfortable seating for your party. There is one particular spot maybe 15 minutes away, just before the track starts to descend again, which has clear views of The Blade, Tasman Island, the cliffs back towards Port Arthur and also Mount Brown and Cape Raoul to cap it off. Obviously care is required along these cliffs. You can also push through the scrub a very short distance right at Perdition Ponds to emerge on the edge of the cliffs there. This is quite spectacular too, although the view is of the sea rather than any landmarks.
Day Two
 |
| Tasman Island from the best high viewpoint. |
 |
| Tasman Island from the summit of The Blade. |
 |
| Tasman Island and The Blade from the cape high point. |
You reverse your outward journey to return to camp.
Day Three
The final day then consists of a return to the car at Fortescue Bay. Some parties vary this by climbing over Mount Fortescue. I haven't been there, and I'm told the views are sparse. I'll update this sometime when I get around to visiting Mount Fortescue.
Friday 21 December 2012
Cape Pillar Photos - December 2012
These photos were taken on my December 2012 trip to Cape Pillar. Previous Cape Pillar trips can be found here and here. Views of Cape Pillar from elsewhere can be found amongst the search results here.
 |
| Tasman Island is a spectacular view from many places on the cape. The lighthouse has been saving seafarers from catastrophe since 1906. Find the details here. The island is formed of Jurassic dolerite, as is the whole cape. |
 |
| The Blade, Cape Pillar. This is one of the most spectacular features of the area. you can climb to the highest point for airy views of the cape and Tasman Island. Great care is required in windy weather, as sections are narrow and precipitous. The Blade is formed of classic dolerite columns, seen in other well-known formations such as Cape Raoul and the Organ Pipes on Mount Wellington. |
 |
| Cape Raoul seen from Cape Pillar at sunset. Cape Raoul is also formed of dolerite, but was used for target practice by the navy during World War I, and is missing some of the columns which should stand at the end. |
 |
| Banksia marginata, the Honeysuckle or Silver Banksia, was in full bloom in early December on the Cape Pillar peninsula. |
 |
| (Multi-shot) panorama of the cape from the top of The Blade. From here we can see the three capes, Cape Raoul at far left, Cape Hauy right of centre in the background and Cape Pillar being the highpoint to the right. You can climb to the two summits at the end of Cape Pillar and they are well worthwhile, although the most spectacular views are probably had from this highpoint of The Blade. |
 |
| The entire walk is decorated with these bright markers and various tapes. I presume they are part of the survey of the track for the improvements planned for the Three-Capes Walk. I will post some more information about this shortly. |
 |
| The Blade and Tasman Island from one of the many vantage points along the track. The walk to the end of the cape is slowed by both the steep rough terrain and the stupendous views which appear alongside you as you traverse this landscape. Note the landslip and ongoing erosion evident in the cliffs this side of The Blade. |
 |
| Dolerite columns. The rocks end up balanced one upon the other, the result of weathering. In places you wonder how they remain standing. One day of course, these will collapse, and leave a huge scar in their fall to the sea below. |
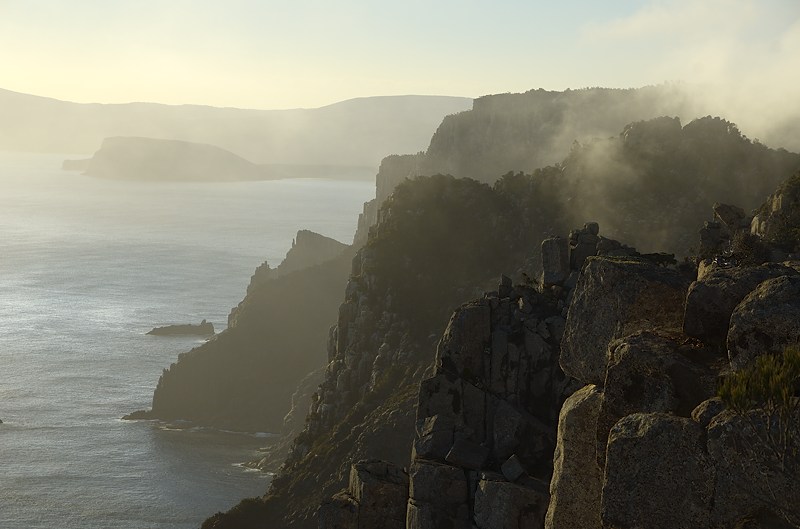 |
| Evening sea mist shrouds some of the cliffs near Perdition Ponds. This view looks west towards Mount Brown and Crescent Beach, both of which can be seen in the background. |
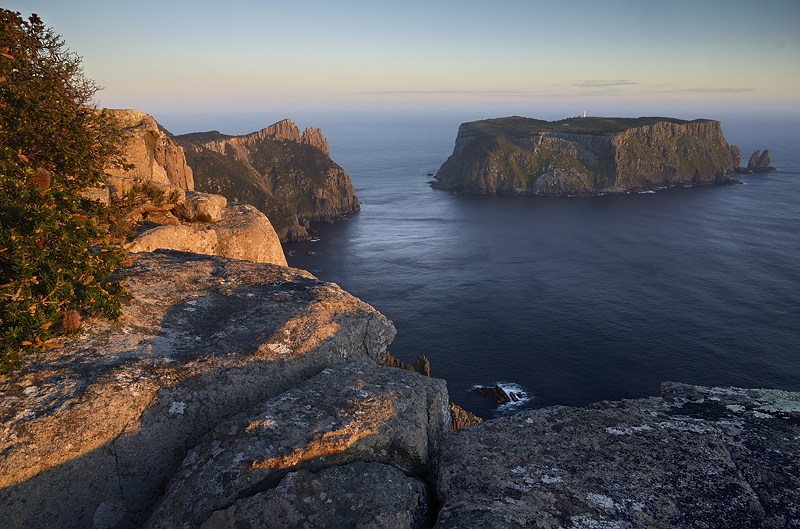 |
| This spot is about 10 or 15 minutes walk beyond Perdition Ponds, and at the right time of year and in the right weather is a great place to take both breakfast and dinner for sunrise and sunset views. It is the last obvious lookout before the track descends towards The Oasis, and provides this most awesome grandstand view. Here the sun sets on Tasman Island and The Blade. The cliffs below here are close to being the highest on the peninsula at around 270m. This place is truly spectacular. A head for heights is useful. |
 |
| Adamsons Peak can be seen beyond Cape Raoul in this westerly view after sunset from Cape Pillar. This was a marvellous evening, with calm seas, gentle breezes and superb views all around. |
 |
| The next morning the sun rises between the cape and Tasman Island, as seen from the same lookout. |
 |
| The Blade at sunrise. Tasmania proves once again to be one of the most beautiful places in the world. |
Cape Pillar Feature
|
| Tasman Island and the ocean... |
This multi-post blog feature will provide information about both the project and the opposition, as well as a walk description, some photos showcasing the attractions of the area, and a special feature on the early summer wildflowers.
The first post is a photo feature from my recent trip, which provided both sunset and sunrise opportunities, as well as the usual daytime clifftop vistas. Second is a walk description which may be useful for people who want to undertake this walk.
- Cape Pillar photo feature, December 2012.
- Cape Pillar walk description.
Thursday 20 December 2012
Kaoota Tramway Track - 5th December 2012
 |
| Kaoota Tramway Track. |
I recommend walking from Margate to Kaoota and then returning, but this is only because I normally like to walk uphill first.
From Margate, turn up Sandfly Road, then into Nierinna Road. There are signs indicating the way to the track, although one, indicating the right turn into Lawless Road was pointing in exactly the opposite direction to where it should have been. I wondered if some of the locals don't like the extra traffic the track has produced.
There is a very small parking area indicated by signs at the point where you must stop. Park as far off the road as possible.
The road continues up the hill, and the walk proceeds along it. This is a private road, and permission has been gained for walkers, horse riders and cyclists to use it to access the Kaoota Tramway Track. The road climbs a way and then a sign clearly indicates the start of the tramway. The slope is necessarily gentle throughout its length, and is very easy to follow. It emerges at Kaoota, where there are some picnic tables and a slightly larger parking area. For this reason, you may prefer to start at Kaoota. I can see the track being used by cyclists too, given the easy slope. The walk is about 6.5km each way between the parking areas.
Various plants are in flower at this time of year. This is a nice easy walk fairly close to Hobart which might be good to do on days when the weather keeps you off some of the higher hills. It was rainy the day I went. I found that there's a cafe at the Margate Train when I had finished walking.
 |
| The tramway includes this cutting |
 |
| Bridges have been built across creeks |
 |
| Goodenia ovata, Hop native-primrose |
Natone Hill - 4th December 2012
 |
| Mount Wellington from Natone Hill |
Driving from Hobart, cross the Tasman Bridge and head left for Geilston Bay. At the Geilston Gay traffic lights, turn left and then left again into Nubeena Street. head up the hill and park below the walking track which crosses the top of Nubeena Street.
You can wander about the hill on a variety of tracks as much as you like. I suggest an anti-clockwise circuit, so turn right and head around the north side of Natone Hill, with views of Geilston Bay (the bit with water in it!) and industrial establishments across the River Derwent such as Selfs point and the zinc works. Views of Mount Wellington open up. You will come to a track heading uphill on the left, named the Selfs Point View Track. This climbs steadily to the top of the hill, with better views of the mountain opening up.
From the top, another track heads down towards the Tasman Bridge, and provides good views of it. Turn left on a walking track before you reach Tianna Road, and this will wind back around the hill to return you to the start.
The walk will probably take less than an hour. I went round twice to explore more than one route. This is a good easy walk in the bush for those days when the weather isn't great or you don't have much time.
 |
| The Tasman Bridge from Natone Hill |
Saturday 1 December 2012
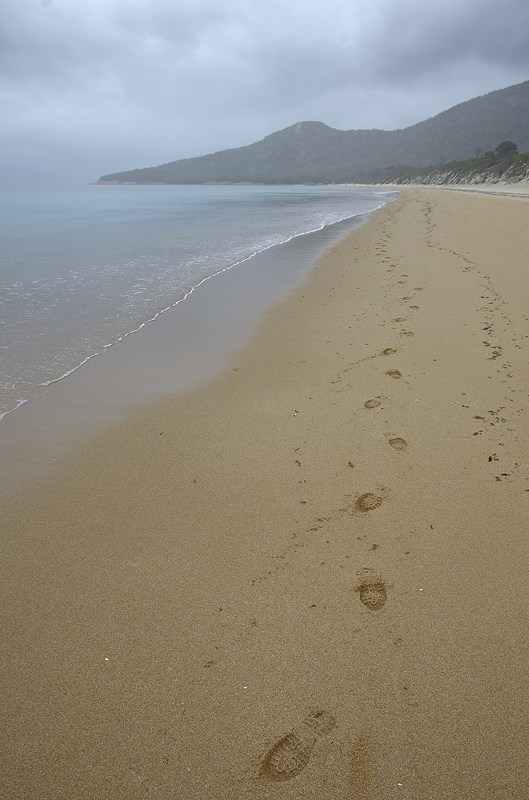
Freycinet Peninsula - 26th-28th November 2012
Had three days, two nights organised to walk down Freycinet Peninsula. I've previously been there in the middle of summer and walked back across the heights on a 35° day, so a slightly earlier trip aimed for cooler weather. In the event, the first two days were mainly cool, cloudy and sometimes drizzly, but the third day was sunny and warm without being too hot. It's a "while" since I carried an overnight pack, so there were some muscle-training issues to deal with too.
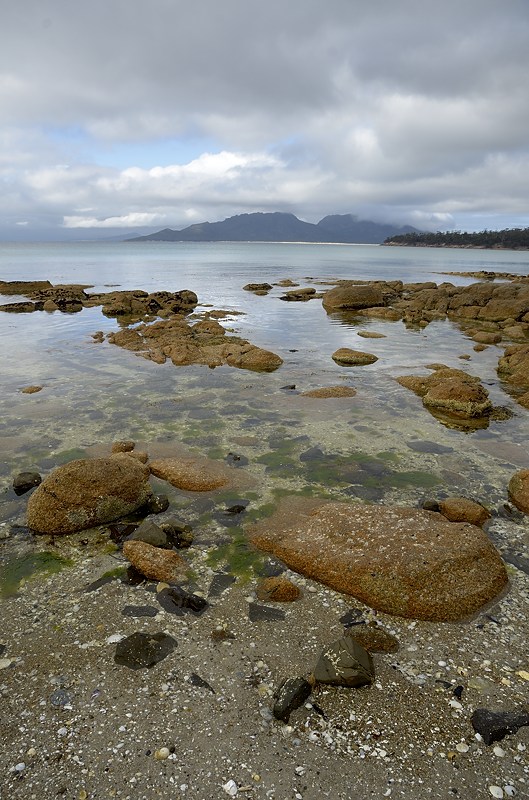
The track emerges on Hazards Beach, a quite sheltered beach, down which you walk to Lagunta Creek (often dry, but flowing gently at the moment), and some rocks with an interesting geological history.
From there the track heads a little inland and undulates southwards to Cooks Beach, then follows the beach south to Cooks Corner where there is a campground and water tanks fed from the roof of the old farmhouse. These water tanks are basically what makes Freycinet walking relatively easy once the weather dries up, as otherwise everyone would have to carry all or most of their water. Please use the water sparingly, as the tanks can become low later in the season if rain is scarce.
From Cooks Beach, you can walk further south to Bryans Beach and beyond, and this is a good half-day or day walk. There is no reliable water south of Cooks Beach, so it must be carried. Bryans Beach is a lovely, moderately sheltered beach and well worth a visit. It is only about 40 minutes walk through the forest from Cooks Beach to emerge at the northern end of Bryans Beach.
On a following day, the return leg of the walk heads back along Cooks Beach to its northern end, then turns sharp right and heads up onto the southern flanks of Mount Freycinet. This is a good solid climb through attractive forest. It emerges at the saddle between Mount Freycinet and Mount Graham at around 400m in height. From there you can turn left and climb 620m Mount Freycinet, as a steep and rough sidetrip, leaving your pack at the intersection. Having been there a couple of times before, I didn't climb it this time. Mount Freycinet has superb views as it is the highest point on the peninsula. Various creeks were flowing either moderately or as a trickle last week, although without further good rains, these should not be counted on, and you need to carry sufficient water. In hot weather, this return trip can be quite demanding.
The main track continues steeply onto 579m Mount Graham, and passes about 100m from its summit. You can leave your pack and use obvious tracks to find the summit rocks, which provide great views of Wineglass Bay and The Hazards.
With the route to Wineglass Bay being downhill, you would be forgiven for thinking the hard work was over, but I find that much of the track across the top of the hills and down to Wineglass Bay is quite taxing. There are some steep rocky sections, and much of the track is quite rough and as a result takes longer than I expect it to! There is one section in the forest where the track arrives suddenly on a moderate cliff, and sidles along a ledge. If taking children across here, make sure they are competent to avoid falling off things. However, it is a quite pleasant walk, initially across quite open heathland and then in the forest, and eventually emerges at Wineglass Bay where a break and maybe a swim will be welcome on warm days. There is rarely flowing water in the creek at that point. The standing water doesn't inspire confidence.
The final leg is along Wineglass Bay beach, with the stunning views of the southern side of The Hazards falling steeply into the water, then back up and over the saddle to the carpark.
Overall, this walk requires moderate fitness (to carry your pack over the mountains) but does not require all the warm and waterproof gear you might need for other Tasmanian walks. It can be done in two days, with one night spent at Cooks Beach, although I took three days with a leisurely day of wandering about taking photographs in between. The scenery is great, there's plenty of wildlife, and there's plenty of camping space. I recommend asking the rangers about the availability of water before undertaking this walk. They may even be able to tell you that certain creeks are flowing, saving the lugging of water up part of the hill, although they understandably avoid guessing.
The Walk
I did what is called the "anti-clockwise circuit of the peninsula". You leave from the Wineglass Bay carpark, and climb to the saddle before heading down to Wineglass Bay. From there, the Isthmus Track heads west through pleasant forest to Hazards Beach on the other side of the peninsula. This track passes close to the northern end of Hazards Lagoon. This is often dry, but at the moment is full of water and life. |
| Hazards Lagoon, Freycinet Peninsula - 26th November 2012 |
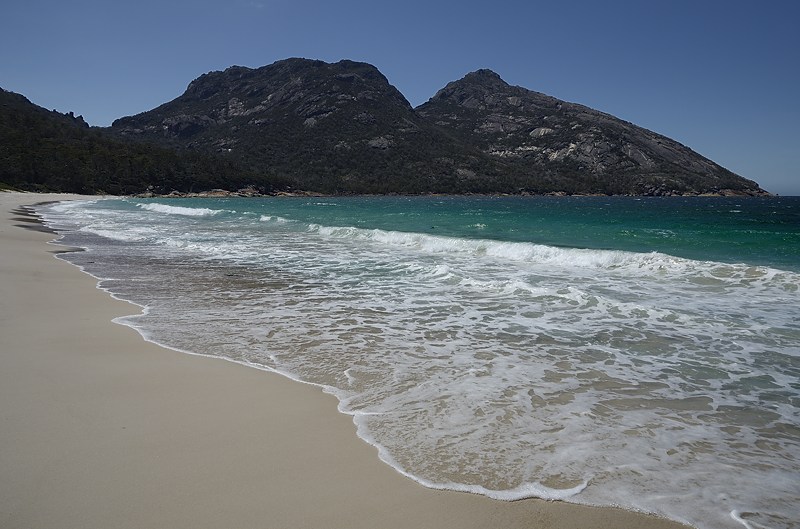
 |
| Looking north along Hazards Beach, Freycinet Peninsula - 26th November 2012 |
 |
| The Hazards seen from Cooks Beach - 27th November 2012 |
 |
| Looking south to Schouten Island from Bryans Beach - 27th November 2012 |
 |
| The Hazards from Cooks Beach at sunset - 27th November 2012 |
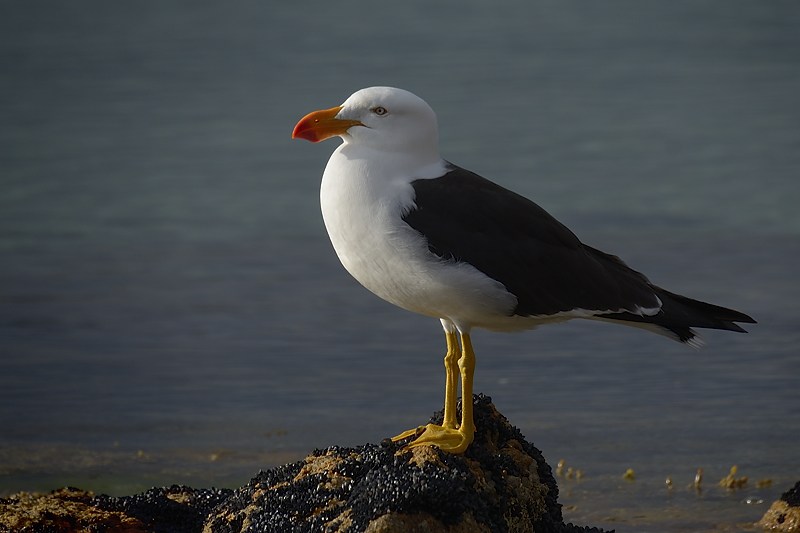 |
| Pacific Gull, Larus pacificus, Freycinet Peninsula - 27th November 2012. |
 |
| Forest in morning sunlight, southern flanks of Mount Freycinet - 28th November 2012 |
 |
| White Flag Iris, Diplarrena moraea, Freycinet Peninsula - 28th November 2012 |
 |
| The Hazards and Wineglass Bay from Mount Graham - 28th November 2012 |
 |
| Mount Amos and Mount Dove from Wineglass Bay - 28th November 2012 |
 |
| Mount Graham and Mount Freycinet from Wineglass Bay - 28th November 2012 |
The final leg is along Wineglass Bay beach, with the stunning views of the southern side of The Hazards falling steeply into the water, then back up and over the saddle to the carpark.
Overall, this walk requires moderate fitness (to carry your pack over the mountains) but does not require all the warm and waterproof gear you might need for other Tasmanian walks. It can be done in two days, with one night spent at Cooks Beach, although I took three days with a leisurely day of wandering about taking photographs in between. The scenery is great, there's plenty of wildlife, and there's plenty of camping space. I recommend asking the rangers about the availability of water before undertaking this walk. They may even be able to tell you that certain creeks are flowing, saving the lugging of water up part of the hill, although they understandably avoid guessing.
Subscribe to:
Posts (Atom)